You can display video live on a computer by switching to the live streaming mode.
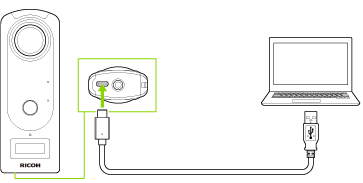
- Connect the camera to the computer using the provided USB cable.

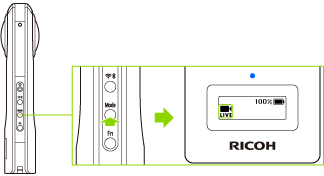
- Press the mode button to select the live streaming mode.

 appears on the OLED panel.
- Start an app that can play back live camera images. (“Media Player Classic - Home Cinema” (MPC-HC) is used as an example in the following descriptions.)
- Select [View] → [Options] in the “MPC-HC” menu.
- Select [Capture] in [Playback] on the [Options] screen, and then select [THETA Z1] in [Video].
- Select [External Filters] on the [Options] screen, and then click [Add Filter].
- The [Select Filter] dialog box is displayed.
- Select [Enhanced Video Renderer] (EVR), and then click [OK].
- The display returns to the [Options] screen.
- Select [Prefer] on the right side of the screen, and then click [OK].
- The display returns to the playback screen.
- Select [File] → [Open Device] in the “MPC-HC” menu.
- The live video is displayed on the computer.
- The shutter button is not used because the video is continually output.
Caution
- Howling may occur if the computer speakers are used. If howling occurs, turn the computer speakers off.
- The following operations are not available with the basic app for smartphone in the live streaming mode.
- Shooting still images and videos
- Viewing images in the camera
- Transferring images from the camera
- Deleting images from the camera
Note
- When the camera is connected using a USB cable, you can display live images while powering the camera. However, if the supplied power is low, a battery drain occurs, and the camera power may turn off.
- Connect the camera to a charging downstream port (USB port compliant with USB BC standard) to supply power effectively.