This section explains basic methods for shooting videos.
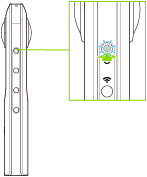
- Turn on the power of the camera.

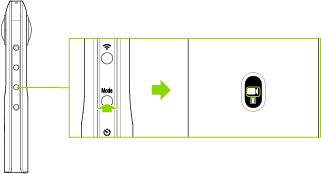
- Press the mode button to select the video shooting mode.

 appears on the OLED panel.
- Position the camera.
- Position the camera as upright as possible.
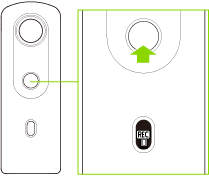
- Press the shutter button.
 appears on the OLED panel during video recording.
- Press the shutter button again to stop shooting.

- The recorded video is saved in the internal memory of the camera.
Caution
- An accurate date and time are not recorded if videos are recorded when the camera has never been connected to a smartphone.
- If you press and hold the power button and wireless button to reset the camera while recording a video, the internal memory may become damaged and may no longer be able to save data.
- Videos may not be transferred to a smartphone depending on the video settings.
- Videos may not be played back on a smartphone or computer depending on the video settings.
- The camera may get hot if you record a video for a long period of time or perform shooting multiple times in quick succession. In this case, the camera may stop operating to prevent damage from high temperatures.
Note
- Videos saved in the internal memory of the camera can be viewed on a smartphone or computer.
- Videos saved in the internal memory of the camera can be deleted using the basic app for smartphone.
- The following operations are not available with the basic app for smartphone while recording videos.
- Viewing images in the camera
- Transferring images from the camera
- Deleting images from the camera
- The camera automatically enters the sleep mode if no operations are performed for a set period of time (default setting: 5 minutes). Shooting is not possible in the sleep mode. Press the power button to enable shooting, and then press the shutter button to perform shooting.
- If no more time remains for shooting, delete images from the camera.