When the connection settings between the camera and a smartphone are done, photos can be taken using the smartphone application. (Connecting the Camera to a Smartphone)
-
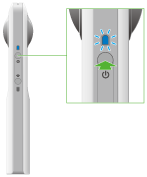
Press the power button on the camera to turn the power on

-
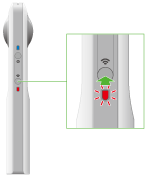
Press the wireless button to turn the wireless function on

- The wireless lamp lights in red.
- This does not need to be done if the wireless lamp lights in red when the power is turned on.
- Select the SSID of the camera in the Wi-Fi settings of the smartphone
-
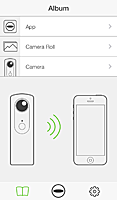
Start the smartphone application
- The wireless lamp lights in blue.
-
Tap
 to display the shooting screen

-
Tap
 to take a photo

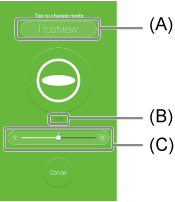
- Tap (A) to change the transfer mode.
Postview: Photos are transferred to the smartphone at the same time as being saved in the camera’s built-in memory.
No Postview: Photos are not transferred to the smartphone. - (B) is a guide to the remaining number of photos that can be taken.
- Exposure compensation can be done using the slider at the center of the screen (C). Move it to the right to brighten the photo or to the left to darken the photo.
- Tap (A) to change the transfer mode.
Note
- If a photo is taken while connected to a smartphone with a GPS function enabled, position information is recorded for the photo.
- If [Transfer method] is set to [Move], photos are deleted from the internal memory of the camera after being transferred to the smartphone.
- Photos can also be taken using the shutter button of the camera. However, these photos are not transferred to the smartphone.
- The exposure compensation settings return to the default when the power is turned off.
Caution
- If the Wi-Fi connection fails, check the Wi-Fi settings of the smartphone.