Various settings such as the exposure mode and white balance can be set to suit the shooting conditions.
* Only the video size can be changed when shooting videos.
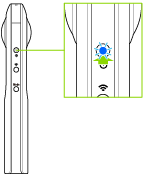
- Turn on the power of the camera.

- To change the shooting conditions for videos, press the mode button to switch to the video mode.
- Connect the camera to a smartphone via a wireless LAN or Bluetooth®.
- Start the basic app for smartphone.
- Tap the shooting mode button in the lower right-hand corner of the screen to change the mode.
- Auto:
- The shutter speed, ISO sensitivity, and white balance are adjusted automatically according to the shooting environment. The image correction method can also be selected from the noise reduction, DR compensation, and HDR rendering.
The camera returns to this mode each time the power is turned on. - Tv (Shutter priority):
- The shutter speed and white balance can be set.
- ISO (ISO priority):
- The ISO sensitivity and white balance can be set.
- M (Manual):
- The shutter speed, ISO sensitivity, and white balance can be set.
- Make settings for each item.
- Move your finger over each setting value to select desired settings.
- The section displayed in white is the current setting.
- The setting ranges and options that can be selected for each item are as shown below.
- Shutter speed:
- 1/8 to 1/25000 (Auto, Shutter priority), 60 to 1/25000 (Manual)
- ISO sensitivity:
- Still image: ISO 64 to 1600 (Auto), ISO 64 to 3200 (ISO priority, Manual)
- Video: ISO 64 to 6400
- Live streaming: ISO 64 to 6400
- White balance:
 Auto: Adjusted automatically.
 Outdoor: Adjusted for shooting outdoors (when sunny).
 Shade: Adjusted for shooting in the shade.
 Cloudy: Adjusted for shooting when cloudy.
 Incandescent light 1: Adjusted for shooting in incandescent light.
 Incandescent light 2: Adjusted for shooting in incandescent light.
(More red remains than when using [Incandescent light 1].) Daylight color fluorescent light: Adjusted for shooting in daylight color fluorescent light.
 Natural white fluorescent light: Adjusted for shooting in natural white fluorescent light.
 White fluorescent light: Adjusted for shooting in white fluorescent light.
 Light bulb color fluorescent light: Adjusted for shooting in light bulb color fluorescent light.
- CT Settings: Adjusted with a specified color temperature value in the range 2500 to 10000 K.
- Tap
 in the upper right-hand corner of the screen during shooting still images to turn on [CT Settings].
- Tapping EV displays the slider for correcting the exposure. Moving the slider to the right brightens the image. Moving the slider to the left darkens the image.
Caution
- If the shutter speed is set slower than 1/8 seconds in the manual mode, a sound is heard both at the start and end of shooting. If images are captured with the noise reduction set in the auto mode, a sound is heard both at the start and end of shooting. At this time, images are not saved if the power is turned off before shooting is complete.
- When shooting in the auto mode with the noise reduction or HDR rendering set, fix the camera in place using a tripod to prevent the camera from moving.
Note
- Shooting condition settings are retained until the power is turned off or the settings are reconfigured.
- For videos, only the auto mode can be selected for the shooting mode. Settings such as the shutter speed, ISO sensitivity, white balance, and exposure cannot be changed.
Changing the Still Image Capture Mode Settings
Tap  in the upper right-hand corner of the screen during shooting still images to change various settings for the still image capture mode.
- Shooting method:
- The shooting method can be selected from [Normal shooting], [Interval shooting], [Self-timer shooting], and [Multi bracket shooting].
- Display after shooting:
- You can set whether or not to display the image after shooting.
- CT Settings:
- The color temperature setting can be turned on and off.
Note
- The settings can be made for the interval shooting to capture images at a fixed interval.
Set [Shooting method] to [Interval shooting], and make the following settings.- Interval: 4 seconds to 60 minutes
- Total shots: 2 to 200, Not specified
- For the self-timer shooting, the countdown time can be selected from 10 seconds, 5 seconds, and 2 seconds.
Changing the Video Mode Settings
Tap  in the upper right-hand corner of the screen during shooting videos to check and change various settings for the video mode.
- Microphone gain:
- The gain of the microphone can be set.
- [Normal] Used when the ambient sound volume is normal.
- [Low] Used when the ambient sound volume is high.
- Recordable time (1 time):
- The maximum recordable time per shooting can be set.
- Video size:
- The video size can be selected.
- Camera shutter volume:
- The volume of the shutter sound can be set.