When the power of the camera is turned on and the initial settings are complete, the shooting screen is displayed on the LCD panel.
You can display various screens by swiping left, right, up, and down on the shooting screen.
Information Displayed on the Shooting Screen
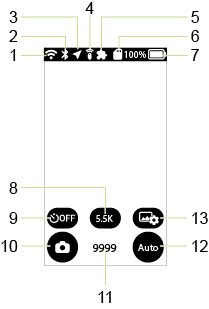
-
Communication status
 : The wireless LAN function is on in the access point mode.
 : The wireless LAN function is on in the client mode.
 : A USB-Ethernet adapter is used.
 : The camera is in the access point mode or not connected to ricoh360.com. (There are images in the camera waiting to be uploaded.)
 : The camera is in the access point mode or not connected to ricoh360.com. (There are no images in the camera waiting to be uploaded.)
 : The camera is connected to ricoh360.com in the client mode and on standby. (There are no images in the camera waiting to be uploaded.)
 : The camera is connected to ricoh360.com in the client mode and uploading images.
 : The camera is connected to ricoh360.com in the client mode and on standby. (The cloud storage capacity for the account used has reached its limit and there are images in the camera waiting to be uploaded.)
After connecting to the cloud via the app “RICOH360”:
-
Bluetooth®/TM function
 : Bluetooth®/TM function is on.
-
Position information addition function
 : The position information addition function is on.
 : The position information addition function is on but the position information has not been acquired yet.
-
Remote control
 : The Remote Control TR-1 (sold separately) is connected.
-
Plug-in
 : A plug-in is running.
-
Memory card
 : A memory card is inserted. (The icon flashes until the camera recognizes the memory card.)
 : A memory card error has occurred.
-
Battery level
 to
to  : Battery level (100% to 0%)
 : The battery is charging.
 : Power is being supplied without the battery.
-
Image size / Video size and maximum recordable time

 : In the still image shooting mode, the image size is displayed. You can switch image sizes by tapping the button.
In the video shooting mode, the video size and maximum recordable time are displayed.
-
Self-timer
- Tap the button to turn the self-timer function on and off.
 : The self-timer function is off.
 : The self-timer function is on. (The number of countdown seconds is displayed on the button.)
-
Shooting mode
- Tap the button to display the shooting mode selection screen.
- Select the shooting mode from the still image shooting mode, video shooting mode, and live streaming mode (only when the camera is connected to a computer with a USB cable).
 : Still image shooting mode
 : Video shooting mode
 : Live streaming mode (only when the camera is connected to a computer with a USB cable)
Note
- You can also switch the shooting mode by pressing the mode button on the side of the camera.
-
Number of recordable still images / Video recordable time
Note
- The number of recordable still images and video recordable time are guides only.
- The maximum number of recordable still images that can be displayed is “9999”. Even when the number of recordable still images is more than 9999, it is displayed as “9999”.
-
Exposure program
- Tap the button to display the exposure program selection screen.
- Select the exposure program from Auto, Shutter priority, ISO priority, Manual, and My Settings (only when the settings are registered).
 : Auto
 : Shutter priority
 : ISO priority
 : Manual
 : My Settings (displayed above the exposure program button only when the settings are registered). If you change the shooting conditions after selecting My Settings, the icon changes to
  .
.
-
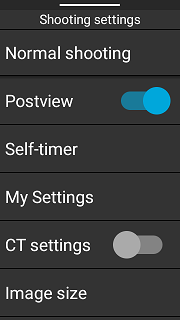
Shooting settings
 : Tap the button to display the shooting setting screen.
-
Others
 : The electronic compass is malfunctioning and the azimuth orientation cannot be obtained correctly. With the camera turned on, move the camera as if drawing ∞ (infinity symbol).
 : The temperature of the camera has risen. Do not keep touching the camera. If the temperature continues to rise, the camera will be forcibly stopped for safety.
Note
- You can change the Live View display area by swiping on the Live View image displayed on the shooting screen.
- Touch and hold the center of the screen to hide the shooting information and display only the Live View image. Touch and hold the screen again to redisplay the shooting information. When the touch shutter function is on, you cannot hide the shooting information by touching and holding the screen.
Switching to Various Other Screens
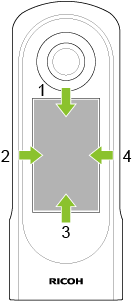
Swipe from the edge of the LCD panel while the shooting screen is displayed to switch to various other screens.
|
1. Camera setting screen 2. Playback screen 3. Shooting parameter setting screen 4. Plug-in selection screen |
-
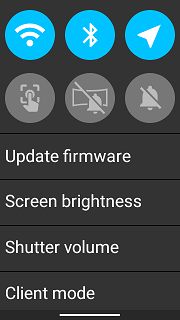
Swiping down: Camera setting screen
-
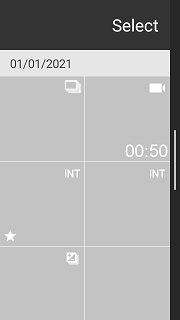
Swiping right: Playback screen (thumbnail display)
-
Swiping up: Shooting parameter setting screen
Swiping up again: [Shooting settings] screen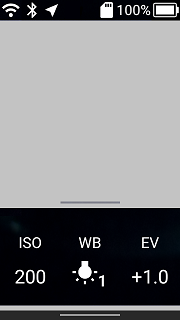
-
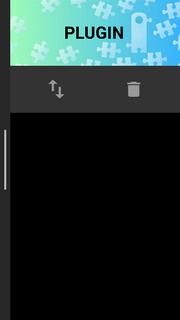
Swiping left: Plug-in selection screen
You can return from each screen to the shooting screen by swiping the bar at the screen edge toward the center or pressing the shutter button. However, when the shutter button is pressed on the shooting parameter setting screen, shooting is performed without returning to the shooting screen.
